Thursday
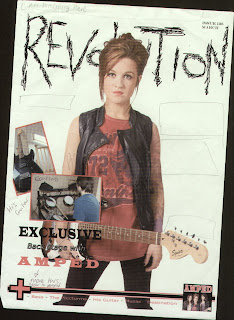
Front Cover Drawing
From my existing magazine research and audience research I have put all my initial ideas together and designed the front cover for my magazine.
Wednesday
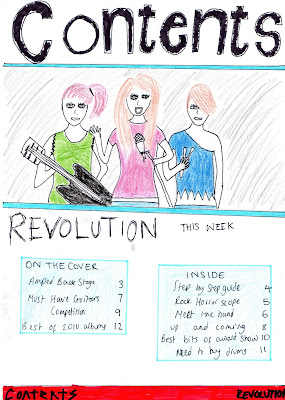
Contents Page Drawing
From my existing magazine research and audience research I have put all my initial ideas together and designed the contents page for my magazine.
Tuesday
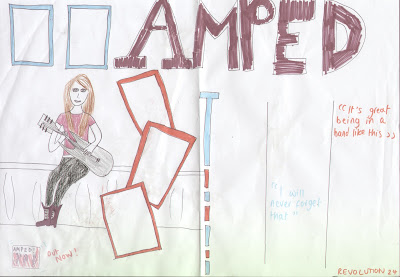
Double Page Spread Drawing
From my existing magazine research and audience research I have put all my initial ideas together and designed the double page spread for my magazine.
Monday
Diary Entry
Week Six (work experience week)
7th March – Today I began to think about where I want to take my photos of the band I am using in my magazine.
8th March – Today I began to ask people who were available to be my models for my magazine and were ok if I needed to use them again later.
9th March – Today I began to think about stories I could use in my magazine as well as whom else I want in my magazine as well as the main band.
10th March – Today I began to think about when I need to do parts of my magazine and how long it should take me so I keep up to date with my work and meet my deadlines.
11th March – Today I wrote all of these ideas down on a scrap piece of paper so when I go back to school I know what I need to do straight away.
Diary Entry
Week Seven
14th March – Today I scanned in my double page spread drawing and posted it on my blog as I was unable to find a scanner big enough earlier. I also began to take photos that I will use as the small images on my magazine cover.
15th March – Today I made the writing for the title of my front cover. I also added in the smaller pictures I had taken the previous day.
16th March – Today I carried on with making my front cover and began to make my contents page.
17th March – Today I added pages onto my contents page. After school I took photos of my models that are the main story in the magazine. I used the white back screen to take them on. I also took pictures of Abby that I am using as another band.
18th March – Today I looked through the pictures I had taken and decided on which ones I wanted to use and which ones I didn’t. I began to edit the photo I am using for my front cover by cutting out the background.
Development of front cover picture
Sunday
Development of pictures used on contents page
I took this picture to use on my contents page. I cut out this image out using the lasso tool on Photoshop allowing it to stand out more against the block white background.
Saturday
Development of pictures on double page spread
I took this picture of the band that I decided to use on my double page spread. I edited it using the lasso tool on Photoshop to make the background block white so it would stand out more and grab the readers attention.
Friday
Development of title on front cover
I made the title for my front cover on paint by using the pencil tool and scribbling each letter. I wanted the title to look messy and 'rock' so I thought this would be the best way of doing so.
Thursday
Development of Front Cover
During the development of my magazine once I had come up with a few ideas for my front cover I printed it off to get a better look at it. I annotated these sheets with what I wanted to change and add so when I went back to my magazine the next day I would know exactly what to do to make it look better.
The picture at the top shows a picture of one of my first attempts at making my magazine. After looking at it on paper I knew I wanted to add more on the page to fill it out more and move things around to make it look tidier.
The bottom picture is a stage nearer the end of me finishing my rough cut. I knew I wanted to add a bar code and a price for the magazine somewhere on the page as well as adding something else to fill the gaps left.
I am really pleased that I did this as it meant at each stage of making my rough cut I knew what I needed to do and what I wanted my magazine to look like so I didn’t waste any time thinking about it in the lessons and just got on with making it.
Wednesday
Development of Contents Page
As well as looking at my front cover I also printed out my contents page. I had more difficulty with my contents page as I like the top of it but I couldn’t get the bottom half right which meant I spent longer trying to develop it.
I have wrote on this page things I wanted to change before my final rough cut including adding a line at the bottom of the page and putting a box around ‘This Week’ to try and separate the page more giving it more structure.
Tuesday
Development Of Double Page Spread
I also printed off stages of the development of my double page spread. The example given above is one quite near the end of finishing my rough cut. I wanted to make sure that I was involving my research into my rough cut as much as possible to ensure my magazine was to the best of my ability.
I am pleased that I printed off each stage of my development as I was able to use my time effectively in lessons and make the magazine look the way I intended.
Monday
Diary Entry
Week Eight
21st March – Today I added the front cover picture onto my front cover of my magazine. I also added in the pictures I am using for my contents page.
22nd March – Today I re-arranged my front cover making the main story stand out more. I added more to the front cover too as I thought it looked to empty.
23rd March – Today I looked at the previous magazines that I researched to ensure I was still incorporating everything I had looked at into my own magazine. I decided to add in an editors section into my contents page.
24th March – Today I took a photograph of Laura to use as my editor and wrote up what I want the editor to say.
25th March – Today I wrote up my article for my double page spread.
Subscribe to:
Comments (Atom)


